There are thousands of people on the planet who are tired of keeping their curtains organized. No matter how many varieties and ideas of curtains organizer ideas they use, they end up in a hot mess. Well, there is a quick and easy solution for this, and they are called pinch pleat curtains.
They are super easy to incorporate into your room, and they hide all the discrepancies associated with the curtains adjustment in your room. In this comprehensive guide, we will explain how to make pinch pleat curtains and why they are a must-have decor in your home.
If you are comfortable using a sewing machine, then pinch pleats would be an excellent choice for keeping your rooms organized and tidy. But if you are new to a sewing machine, then there are chances that you will find yourself challenging in making pinch pleat curtains for the first time.
Hence, the pinch pleat curtains can be recreated using iron as an alternative. Let us show you how it can be done.
Similar Post: 11 Genius Outdoor Privacy Screen Ideas to Enjoy in Peace
Why People are Turning to Pinch Pleats?
The answer is simple. They are affordable and stylish. If you go to any professional interior designers, you will see pinch pleats present in their homes.The ones found in interior design homes might be expensive due to the use of extra fabric. However, you can make them with minimal effort and less fabric.
Materials that would be needed:
How to Make Pinch Pleat Curtains using the No-Sew Method
Step 1: Calculate Your Fabric
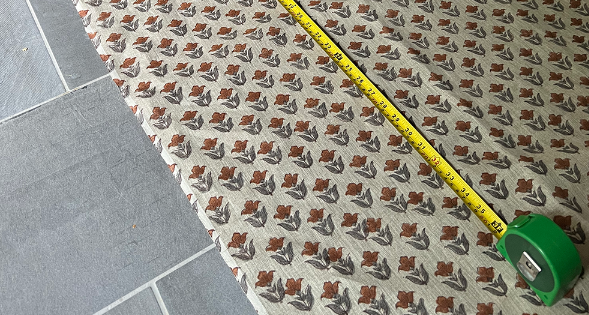
Choose a fabric you prefer, ensuring it adheres to the ‘double rule. This means the size of the fabric needs to be double the length of your finished product. To get the proper height, you need to cut the fabric a little longer. Once this calculation is done, you will have the authority to trim its size.
Step 2: Use Iron on Adhesive
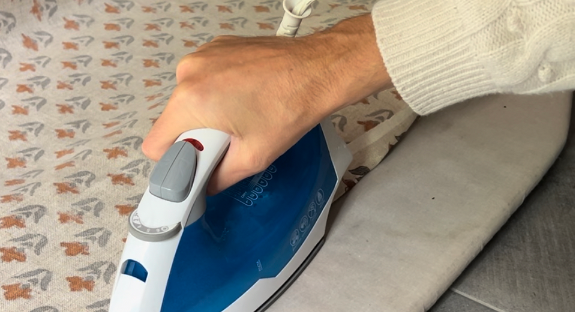
Once you have adjusted the fabric size, it’s time to use the iron-on adhesive. Just fold the fabric and then use an iron to make the fabric stitch to each other. The heat that is generated from the iron easily binds the fabric together. Now press the iron for ten seconds and then repeat the process on the other side of the fabric.
Also Read: 11 Impressive Driveway Gate Ideas that Will Amaze Your Guests
Step 3: Take Care of The Fabric Top
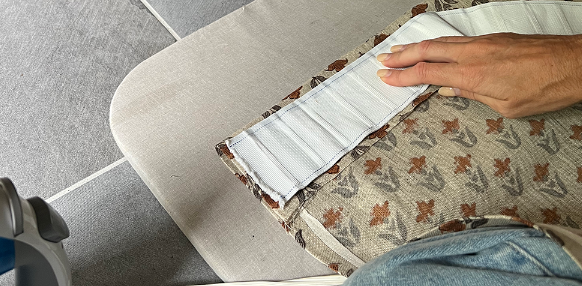
Once the adhesive is applied, you will notice the top of the fabric remains a little wide. This is the portion where your pleat tapes are used. Now, you need to fold the fabric and then place the pleat tape on the top. Once this activity is done, you will notice that ¼ space is present at the top and nearly ½ space remains at the bottom.
Step 4: Use Iron on The Pleat Tape
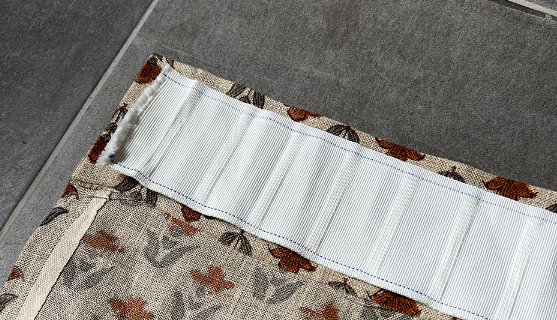
Just as you heated the fabric in the earlier stages, you must do the same thing on the pleat top. Placing two adhesive strips on the pleat top, you need to iron it together. This will provide you with a nice, smooth finish.
Step 5: Check the Fall Length

This is a step where you need to hold the curtain and then check the length of the fall. If you follow the above steps correctly, you will notice that the fall size is only ¼ above the floor. If you want to be a little shorter, you have the authority to make the size adjustment.
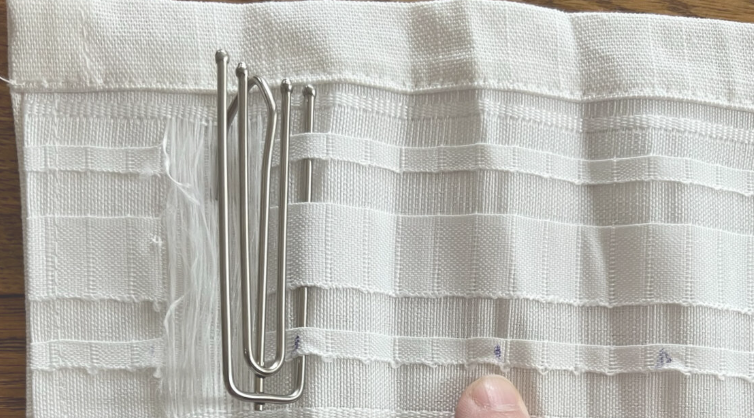
Step 6: Incorporate Your Pleat Hooks
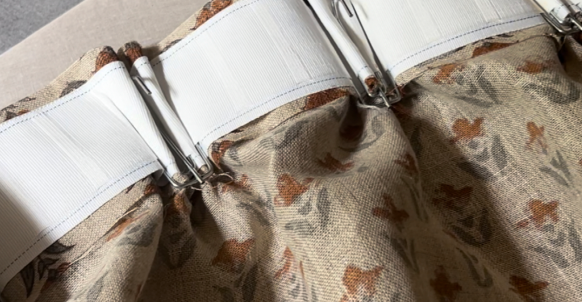
This is the part that will need your careful attention. They are hard to attach, and they would require effort from your side. To get a classic and minimalist look, insert 4 hooks at once, or you can insert 2 or 3. Choose hooks as you see fit.
Step 7: Open the Slits

The slits of the pleat are tightly attached, and you need to open them. For this, you would need a toothpick to open the space. This is a must-have process because iron as an adhesive has already made the slits extremely flat. To adjust this flatness, you would need a toothpick that wiggles it for some time.
Step 8: Inset the Prongs
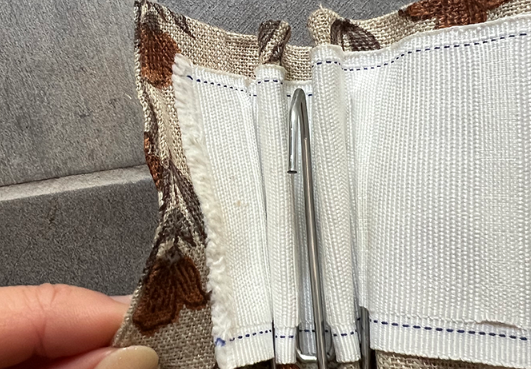
If you have trouble with the toothpick, then it’s better that you use a prong method. For this, insert the middle prongs first and then carefully insert the other prongs. If you follow this method, the result will be perfectly what you predicted.
Step 9: Hang the Curtain
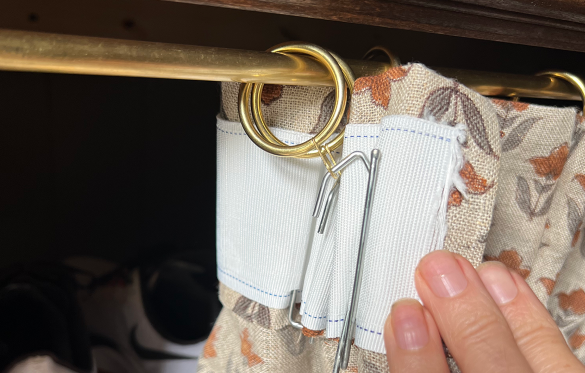
If you have followed all the above steps carefully, you will notice that all the hooks are attached, and now all you have to do is place the curtain rings. Your pleat curtain is done, and you have successfully created a DIY craft within an hour.
Types of Pleat Curtain
Based on your style and convenience, there are certain varieties of pleat curtains to choose from, and they are listed as follows :
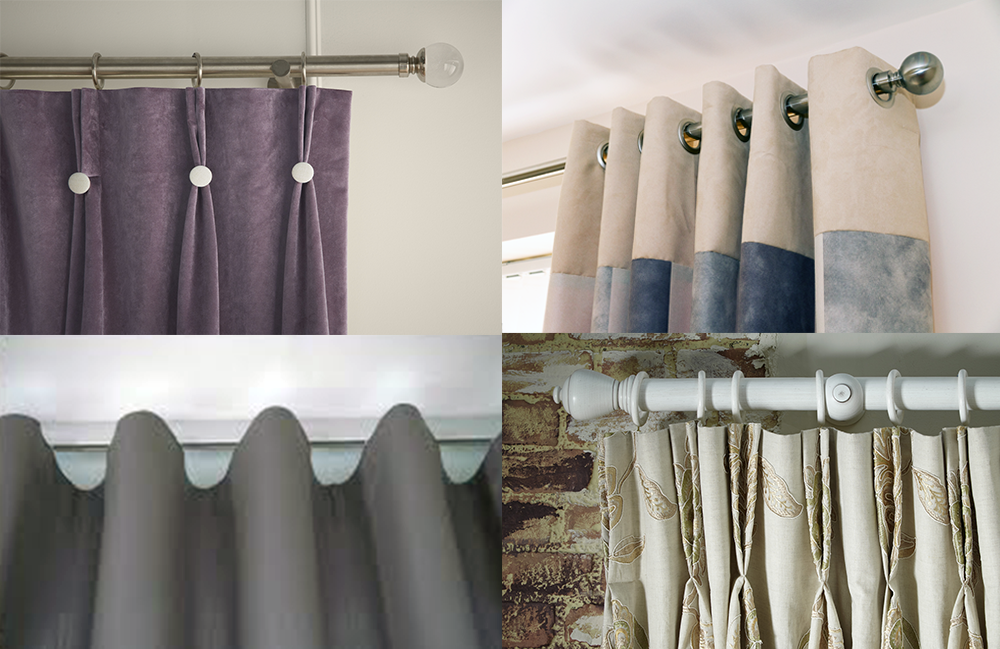
1. Rod Pocket
This is a type of curtain where the top rod is sewn, and the fabric is present at the side. One downfall of this type of curtain is the fact that they are not easy to close or open seamlessly.
2. French Pleat
They are the most common wrinkles used for DIY projects. It gives a nice and clean look when the products are finished. Moreover, it stays in place when the curtains are opened and closed for multiple types.
See More: 5 Easy Steps to Install Beadboard Ceiling Panels in Your Home
3. Drapery Pleat
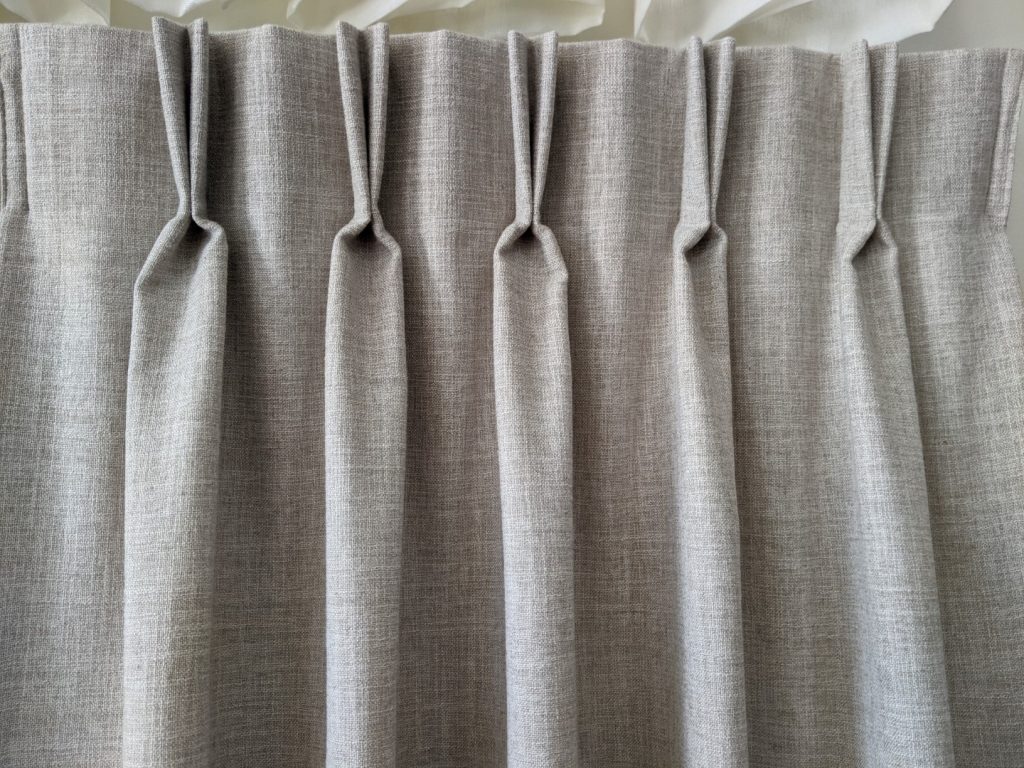
The pinch pleats have been used for a decade, and they gave a mill look to the curtains. These are also used by people who prefer a modern-age look and still prefer a retro look. The entire pinch pleat has an easy learning curve and can be recreated within an hour.
4. Euro Pleats
78 special nails are used to make this crease, and the dimensions range from 1200×800 m. This wrinkle has a minimalist style and can be completed. They look gorgeous in your home as they increase the aesthetics of your home decor.
How to Make Pinch Pleat Curtains That Look Extraordinary
- The first rule is doubling them up. This means the greater the size of your window, the double the fabric size. Normally, all store-bought curtains come in a size 50, so the total amount of fabric that would be needed to cover the width would be 2x. If you have extra fabric hanging around, then hem them up
- Choose to hang the curtain in high or wide mode. This basically means when you choose to hem the fabric, make sure that the windows remain open. When placing the curtain rod above the windows, they should remain at the top, and the space between them should be 4 ft above the window.
- If you have the sewing machine, then taper the sides, and if you don’t have a sewing machine, then use the iron to hem them to fit. Sometimes, the curtain might touch the floor, which may not be nice. To avoid this issue, some of the curtains from the bottom are tapered to fit.
- Train the pleats according to your convenience. Once you have completed the wrinkles, make sure that you leave them untouched for a few days. This will allow the curtain to breathe and achieve the pleated shape that you desire. The last step is hanging the curtain by placing proper hooks, and you are good to go
How to Make Pinch Pleat Curtains for Window
To make pleat curtains for the windows, you must have a layout; this means you need to have proper materials in place so that you don’t have to disturb your building session when you make it. Some of the materials that are needed for pleat curtains for windows are stated as follows
Instructions to Follow
- The first prong must be inserted, keeping a 2-inch distance from the curtain panels. Then, gradually insert the prong inside the loops.
- Now count the spaces to 5 and then insert the next prong and follow the same process as mentioned in the above instruction.
- Now count to 5 spaces again and then make insertion of the third prong into the curtain panels.
- Now, for the last prong, repeat the above steps.
- Now follow the same instructions given from 1 to 4 and for the opposite edge of the curtain panel.
- Once you have completed step 5, you must fold the curtain and check for the center. When you locate the center, count 3 spaces and insert your third prong into the curtain panels.
- Now, to find the location of the second prong, count 5 spaces and make the insertion.
- Repeat the same process as mentioned and insert the other prongs.
- Now, it is time to find the middle hook and the end hook; this could be done by inserting the same steps mentioned in eight and seven.
- For the opposite side, make sure that you repeat step 9.
- Now, you are about to complete the panel, and you have to insert more holes.
- Now, make all the stitches by hand, and the base of the crease is now complete.
- Hang the finished product through the curtain rods.
- Your DIY curation is ready to be displayed.
Related: What Are Pillow Inserts [DIY Guide]
Key Takeaways
When you start your DIY projects, it will be tough to adjust your curtains as you will make many mistakes. To avoid it, you need to carefully follow the steps mentioned in our comprehensive guide to get the output that you have pictured in your mind.
If you are serious about adding a touch of elegance to your home decor, then there is no better way than pleat curtains. The process might take little effort from your side, but it is a rewarding experience when you complete it. If you favor the sewing approach, then securing the fabric is the most important part of the project, as it will allow you to have visual depth.
For those who are comfortable with sewing, you can use the iron rod instead of the sewing machine to complete the process.
Frequently Asked Questions
What are Some Of The Must-Have Materials for DIY Pleat Curtains?
Some mandatory materials that would be needed for making pleat curtains are stated as curtain road, curtain tape, fabric, iron, sewing machine, and thread, which will match the quality of the fabric.
Can a Pinch Pleat Be Made Without Sewing
Yes, absolutely; if you don’t know how to use a sewing machine, we have carefully formulated a step-by-step guide that will allow you to enjoy the pinch pleat without using the machine at all. Make sure that you have an iron rod to complete the process.
Check This Next: Top 9 Brick Fire Pit Plans DIY Designs for Your Backyard