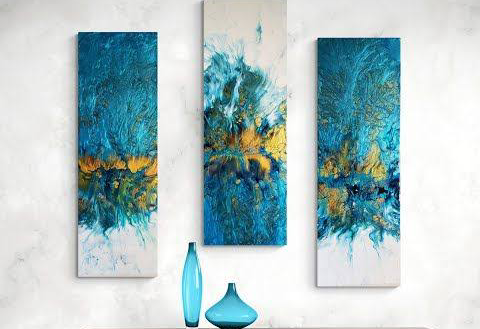
Beautify your home interiors with decorative abstract wall art pieces. Some modern artwork is quite expensive, so if you are not interested in going over budget, it is best to create wall art pieces that are simple, inexpensive, and need minimal supplies.
A blank canvas is the perfect way to begin and see how far your imagination takes you. You can add a wooden or floating frame to enhance its appearance and repurpose other unused materials around the house to decorate your artwork.
For plastered wall art fanatics, DIY spackle art is another way to create impactful wall art pieces that need basic skills and supplies. You can also implement trendy techniques and abstract painting ideas and use unique themes inspired by modern deco, mid-century art, rustic, bohemian, and nautical settings to design your masterpiece.
Read on to find simple tutorials for unique wall art pieces to help design your home interiors.
Similar Post: 18 Beautiful Types of Ceiling Texture for Your Home Interior
Artwork Essentials
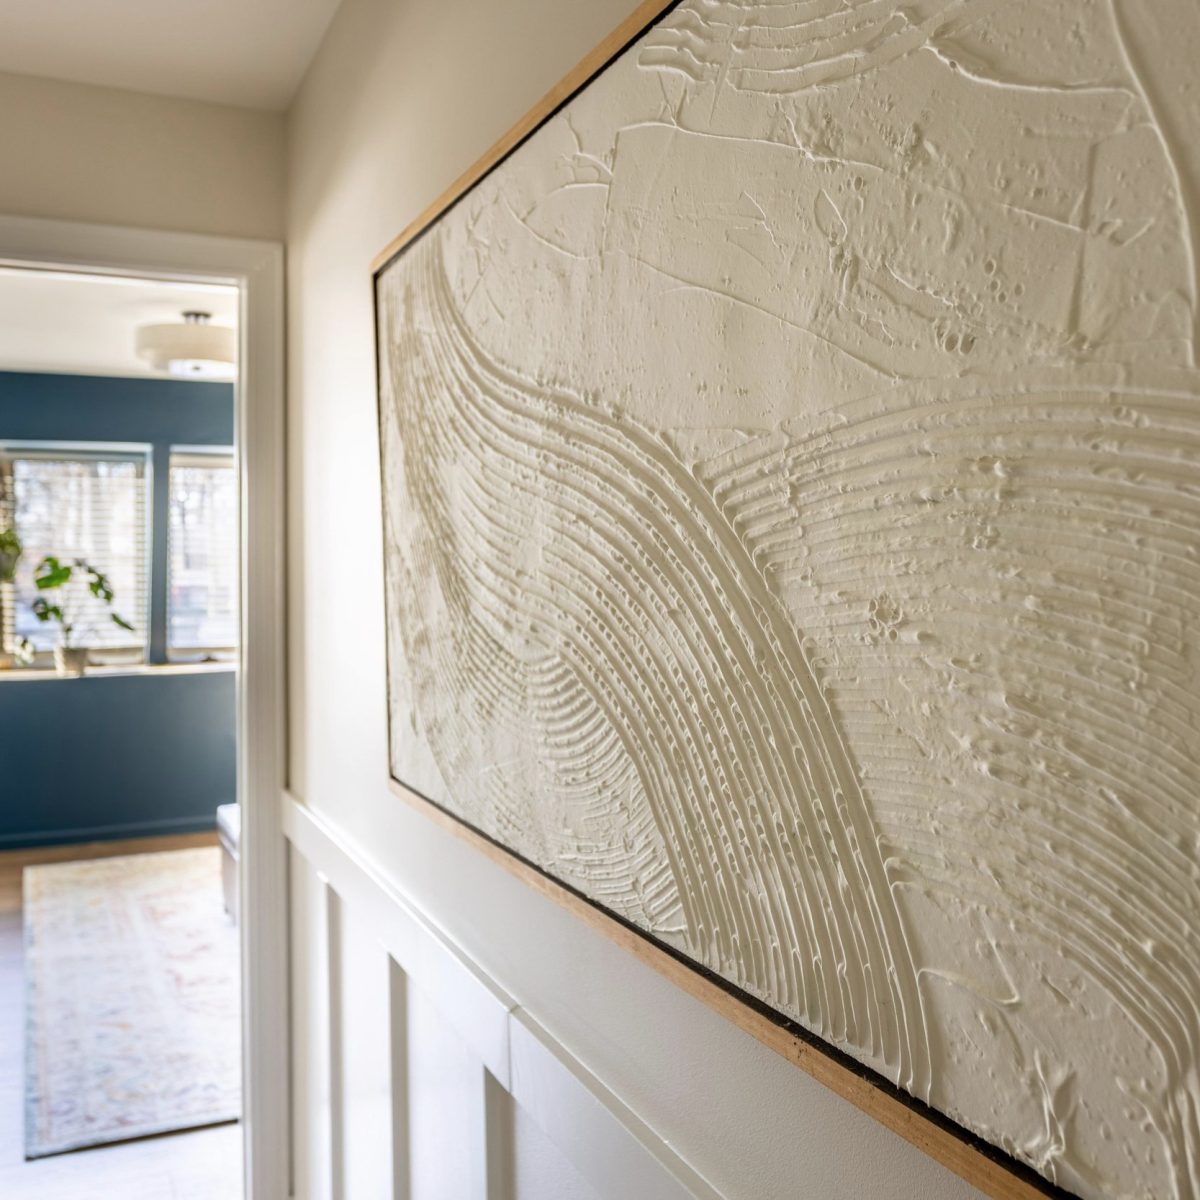
Using a putty knife, spread the spackle layer like icing a cake or smearing cream cheese on bread, and use swirling motions, straight lines, or dotted designs. You can also use innovative ideas like using white spackling with unfinished wood for decorating your DIY spackle art piece.
With 45-50 minutes needed and prep time of barely 5 minutes, a DIY spackle project can cost anywhere between $5 to $50. (Tip: For old canvases, prepare them by painting 24 hours before working on your DIY spackle art).
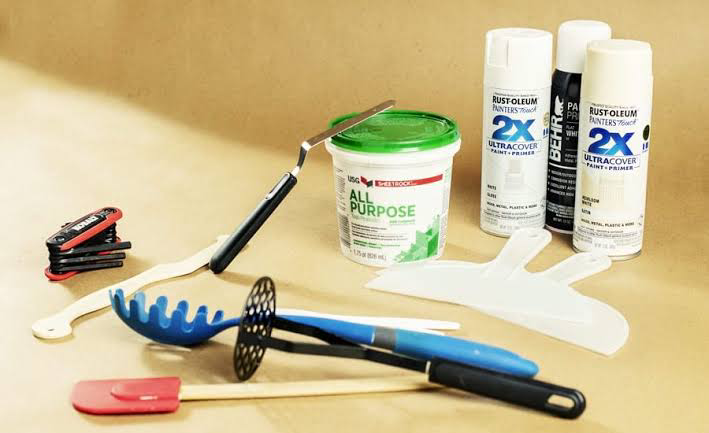
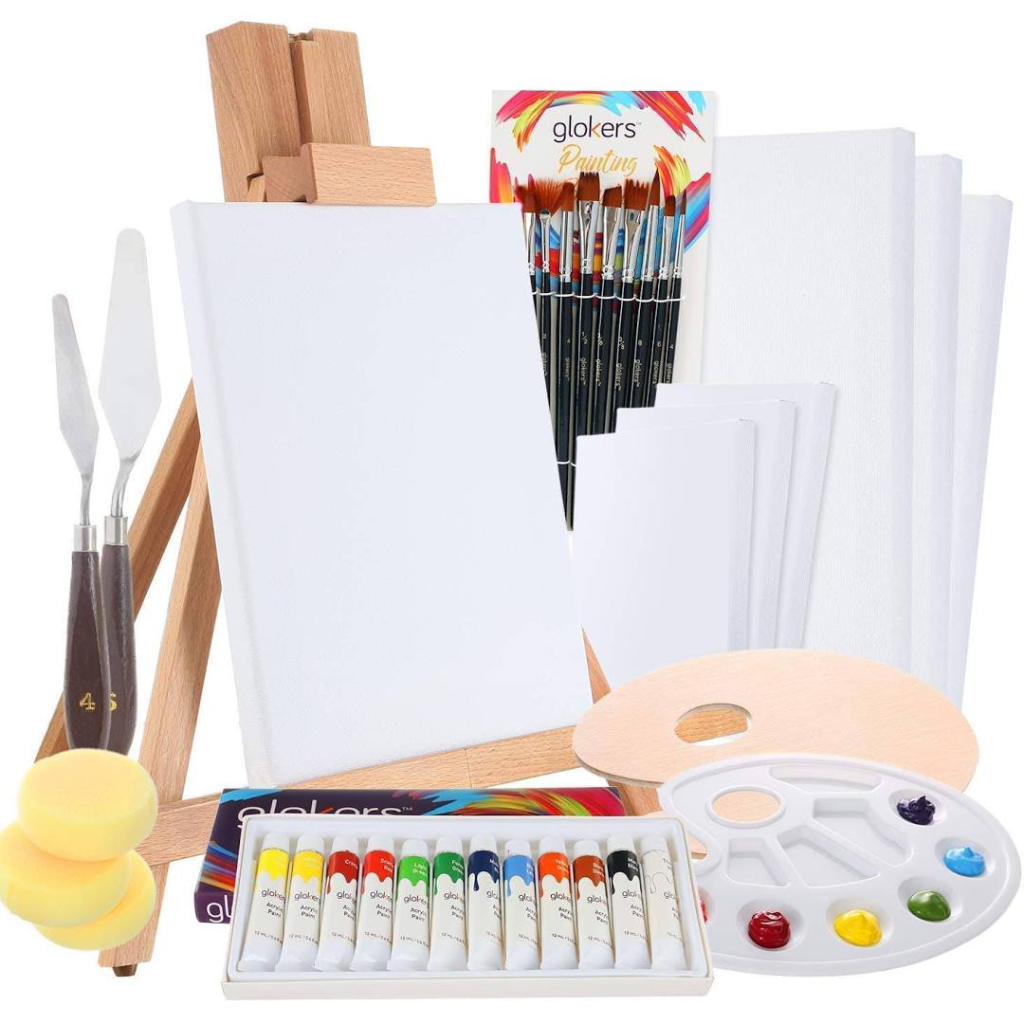
Materials Needed for Your DIY Spackle Art
- Canvas (any size) or small panels for beginners.
- Spackle (begin with a gallon) or heavyweight filling putty-like DryDex.
- Palette knife for mixing pigments.
- Drywall joint and taping knife to cover corners and angles that are difficult to access.
- Spackle knife offset art spatula (or adhesive spreader).
- Metal fork for creating different textures.
- Acrylic or spray paint, based on your created textures.
- Painters tape to prevent caking the canvas edge.
- Metallic flakes for a shiny textured appearance.
- Wood frame to set an aesthetic art apart from its surroundings.
- Drop cloth or rag sheet to protect the floor
- Paper towels to wipe off tools and ensure the process is clean and spackle-free.
While working with older canvas, use white paint to clear spots or marks and leave it aside for 24 hours. If you see the old paint or print, add another coat of white layer and let it dry again. This would also give you a good opportunity to do a color trial run if needed.
If the canvas was colored with oil paints, scrape and sand the fabric to get a clean surface. You can also use sandpaper to resurface the canvas.
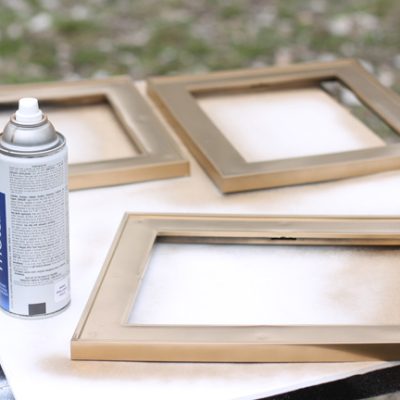
Also Read: Efficient Techniques for Spray Painting Picture Frames
Pro Tip
For true black color, paint twice once a layer dries since the dark color does not come off well on a white spackle layer at times.
Instead of a spackle kit that includes paint scrapers, you can opt for joint compound or drywall mud, but the spackle is lighter and dries easily. However, gives a similar look and feel. Additionally, you can also get creative and use toothpicks, comb, brushes, fork, spoon, or other cutlery to create interesting designs.
Before you begin, lay an old rag or cloth on the floor. Blend the spackle mix carefully and use a drywall joint knife to apply the spackle layer on your canvas. Smoothen the edges and decorate your plastered work, after which it needs to dry for 3 to 6 hours. Paint and frame your design to hang it in any desired corner.
Ways to Create DIY Spackle Art
Now that you know how easy it is to create a DIY spackle art piece, what are you waiting for? Let’s dive into ways that will help you create art and other wall design ideas to decorate different sections of your home.
Related: 11 Gorgeous String Art Patterns You Can Print for Free
Here are Detailed Steps to Design Your DIY Spackle Art Project
- Apply spackle to canvas: Use a putty knife to scoop out spackle, but remember not to work with thick layers, or they will easily flake off.
- Texture canvas: Sometimes, you can use some chunky bits to add texture, so use them creatively. A spackle compound with ridges can comb in more texture.
- Work on edges: Use painter’s tape to keep spackle off the edges. While the plaster is wet, use a tool with a jagged edge to scrape off thick bits.
- Personalize look: Use a knife fork to create swirls and zig-zag patterns. You can also smear for different finishes or to add character to the canvas edge.
- Dry the spackle: Leave the canvas to let moisture dehydrate overnight. However, thicker parts may need more time to fully dry.
Other Measures that Can Be Adopted
- Paint the filling putty: a DryDex has an indicator that turns pink to white when the entire drying process is complete. Once you see no pink spots, paint the artistic piece.
- Seal art: Once you finish painting the spackle, check for inconsistencies and dried bits sticking out to patch up any spots, and finish with a transparent sealant.
- Decorate Frame: Paint the wooden frame or use colorful gemstones, coastal elements, and other enchanting embellishments.
- Finish the piece: Once everything is decorated, mount the framed canvas. If you cannot find a suitable frame, you can use other ornamental accessories to create a border.
- Hang your artwork: Use a hanging wire or supportive structure to put your artwork up on the wall. You can also lean it against the wall or a console.
If you want to make your DIY spackle art a customized piece, you can design your canvas frame and make a joint compound.
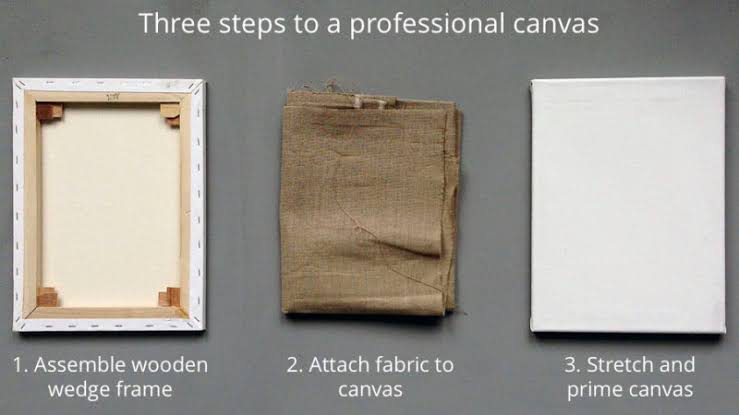
To make a canvas from scratch, get a cotton fabric and use pilot holes with screws to secure the canvas and staple it to avoid ripples. Smooth overfold lines and staple the fabric to the wood from all sides. If you create a small gap between the canvas and exterior structure, a floating frame can be fashioned.
For making your own drywall mud or joint compound, combine flour and one-third quantity of salt, but use varnish or primer instead of water to make the mixture malleable. Alternatively, you can make a mixture of cornstarch, salt, and water.
Other Ideas for Custom-Made Art
For beginners, a minimalist spackle piece with baking soda, clay, or ring art and paint techniques can be a suitable pairing. You can add a whimsical touch using unique shaded canvas pieces or repurposed art bits to design small corner furniture pieces like a dresser or storage locker.
Additionally, with DIY spackle art, you can substitute the filling putty with drywall compound or latex caulk that can be squeezed onto canvas and spread using a spatula. Before you paint the canvas, you can decide on its orientation (landscape or portrait) and use a neutral coat to get started.
Once you choose from wet strokes, water blend methods, and vertical pouring designs, let it dry if you like experimentation, mix and match techniques to beautify your DIY spackle art, and add a protectant finish to prevent your artwork from fading over time.
Look at the following interesting ideas.
Some Inspirational Ideas
- You can repurpose an old canvas. If the underlayer is a darker shade, you can tape the edges and paint over it. Once it dries, you can spackle over and design it using serrated edges, combed ridges, or other techniques. If you do not have a serrated edge scraper, use a fork, comb, or wide tooth hair pick to create wavy patterns.
- With fabric art, you can use a hot glue gun to secure the canvas and use different paints to blend the canvas. You can also use painted driftwood, bits of reclaimed wood, pallet designs, monogrammed prints, botanical elements, vintage pieces, and metal signs.
- If you are obsessed with creating a shiny look, use pastel watercolors, latex furniture shades with metallic flakes and foil paint, or actual gold sheet layers. Using different hues can help generate different dimensions, or use white paint to blend in darker sections.
- To create a statement piece, use embroidered designs or add an elegant touch using gold leaf flakes. Additionally, using short brush strokes and layering paint with gold veining can give a unique look.
Ideas to Give a Check
In the section above we have listed a set of best ideas to be taken up, however, here are a few more that you can adopt for the best possible results as well:
- Before you work on a DIY spackle art, if you prefer beginning with other abstract projects, streamline your color palette and use different shades to design a landscape piece. A wet canvas can be painted with broad brush strokes or use trim brushes to paint across the canvas randomly.
- You can also opt for a monochromatic palette and brush white and black color schemed strokes or mix paint to create ombre gradients, geometric prints, diamond ripples, and constellation patterns. If you like using a neutral palette and want to keep the look minimalist, use watercolors to paint spotted designs or create rainbow-patterned layers.
- Water-based colors with paint or foam brushes and sponges can also be used to create textures and sealed with a top coat or varnish. For adding more definition and texture, you can pour paint vertically and accentuate different focal points on your canvas with different dripping patterns.
- Another abstract technique is to wet-blend paint with water and use different hues to create a smooth transition. You can also use a spray bottle or a foam brush to blend colors. Add finer details with a dry brush method where little paint can be used to brush light strokes or add specks to create finer details.
Final Words
Enhance your home interiors with a DIY spackle art piece that is modern, affordable, and very easy to create. You can also find murals, paintings, or canvas art pieces, but they can be quite expensive, and while it is very generous to support local artists, you cannot drain your bank account.
Instead, grab some spackle and a canvas with some paints and work on a special wall art project.
All you have to do is scoop out some spackling and use scrapers while the layer is wet to create interesting textures. Set the canvas or smaller panels to dry and paint using any technique.
If you use different methods, remember to let the paint dry first and then frame the artwork. Now that you’ve learned how easy it is to work on a DIY spackle art project, get your supplies and give textured art a try.
If you want to get inspired by different designs or look for artwork for specific sections in the house, check out online tutorials that can not only help you with a DIY spackle art design but also give ideas to make everything from scratch.
Frequently Asked Questions
Can You Use Spackle on Canvas?
Using a filling paste on canvas for your DIY spackle art is very easy and affordable. Another advantage of using spackle is that it is lighter and dries faster.
Is It Easy to Use Spackle for Adding Texture?
Yes, a DIY spackle art piece can be easily enhanced with textures, grooves, and ridges using any paint roller, serrated knife, or comb. You can also use household objects like a fork, spoon, hair pick, toothpicks, and other pointy objects to add texture to your artwork.
How Long Does It Take for Spackle Art to Dry?
Ideally, most spackling loses moisture within 3 to 6 hours, but if you have thicker sections and want to ensure complete dryness, leave the piece for 24 hours before you proceed to paint it.
Is It Necessary to Seal a DIY Spackle Art Piece?
Ideally, once the spackle dries, the artwork can be positioned on or against the wall. However, if you are worried about the spackle crumbling, spray paint a transparent sealant layer to protect it.
Check This Next: Top 9 Brick Fire Pit Plans DIY Designs for Your Backyard