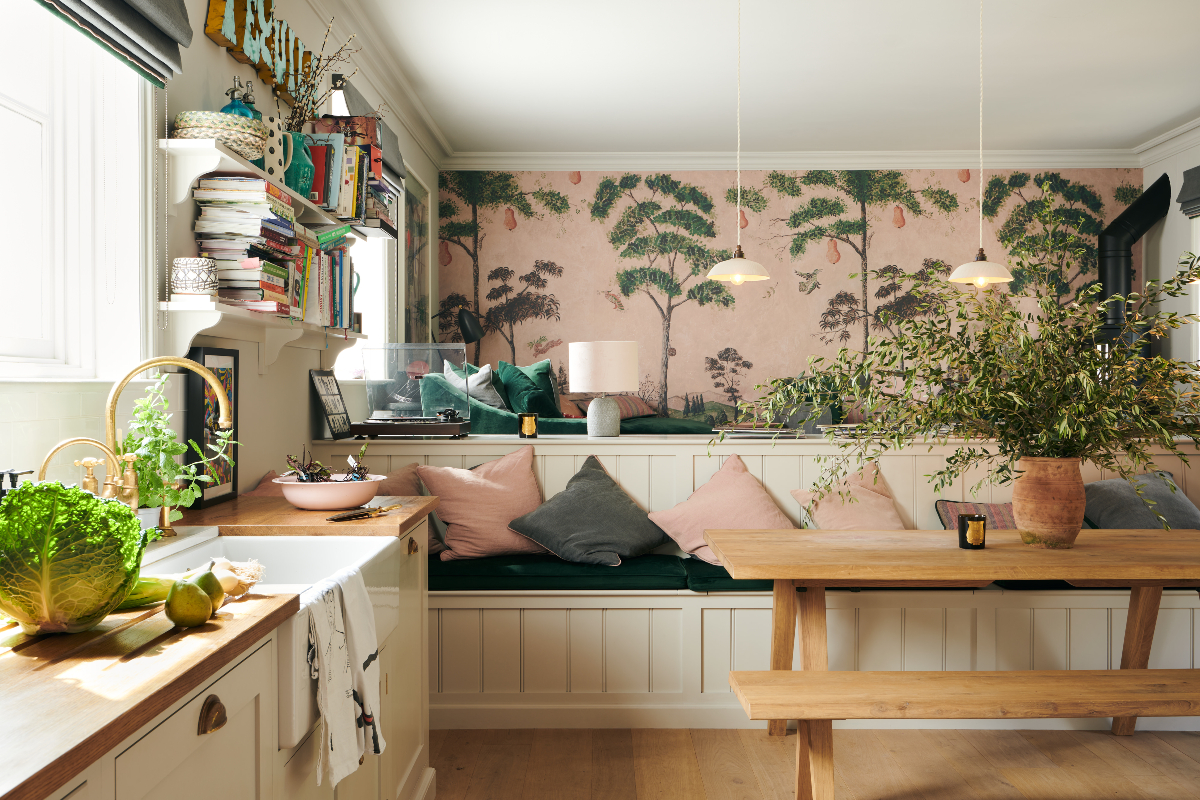
Your kitchen is a wonderful room in your house; you cook delicious food from recipes that have been passed down in your family for generations, try out different food recipes you found on the internet, and you show off your cooking skills to your friends and family. For all these reasons, it is essential to provide an additional touch of grace with banquette seating or any setup of your choice.
Apart from that, having the right cooking equipment, cutlery, kitchen setup, and size make all the difference. So that’s why you decorate your kitchen just the way you want to since you will be spending a lot of time in it.
In this article, you will learn how to add a bench or banquette seating in your kitchen. A small bench is the perfect addition to your kitchen, especially if you need more seating.
A bench is your ideal solution if you can not add another chair to the table. This way, you will make the most use of every inch in your kitchen. These multifunctional banquettes have a double advantage since they give you clever seating solutions and plenty of storage space.
Materials Needed for Installing a Banquette
The materials you need to build a banquette will include all or some, like the Measuring tape, Utility knife, hammer, pry bar, 2x4s, miter saw, screws, Wood glue, wall anchors, wood shims, stain, polyurethane, table saw, stain and poly applicators, wire wool, hammer drill, plywood sheets or panels, lumber, level, sandpaper, paint, paintbrush, painter’s tape, nails, clamps, hinges, framing square, and T-bevel.
Similar Post: 15 Outdoor Kitchen Ideas Inspired by The Best Designs
Steps for Building a Banquette Seating
1. Measure the Space
You need to make sure you have the dimensions of the space where the banquette will be built. The saying “measure twice, cut once” must be taken seriously to make planning your banquette easier. This step will help you determine your banquette’s dimensions.
2. Remove the Floorboards
The floorboards and existing trim pieces need to be taken out so that the banquette can be installed. Use the utility knife along the top of the baseboard since that is where the caulk line will be. With a pry bar and hammer, get behind the baseboard and then pry them off the wall.
3. Build the Frame and the Box
The 2×4 will be used to build the interior framing of the seating booth, as this gives structural support. You need to build a similar frame for the benches.
4. Reinforce the Framing
Cut the 2x4s to use for horizontal and vertical reinforcements. Put these supports on the intersection of the two pieces and the halfway point from the bench’s end to the corner intersection. Another 2×4 should be attached to the inside corner of the longer box.
5. Install the Trim
Cut the primed trim into pieces; pre-drill and then screw them onto the edges and the corners of the benches’ faces vertically. Measure and cut trim pieces so that they fit horizontally between the vertical pieces. Cut pieces and put them vertically in the middle of the benches’ faces. Pre-drill and screw so that the wood does not split. Sand the benches’ top edges so that unevenness is smoothed out.
6. Make the Lids
Cut a square piece of plywood and screw it on the bench’s corner. Measure and cut two pieces of plywood for the lids. For the benchtop’s stationary piece, rip a piece lengthwise from the lid pieces and then screw them face down just along the wall on the sides of the bench. Put the remaining larger pieces of the lid face up on the bench. Leave a gap for the hinges between the plywood pieces. After the lid pieces are set, mark with a pencil where a diagonal notch will be cut from the lids’ inner corners so that the lids can close without overlapping.
7. Put into Place the Hinges
Center the piano hinges on the lids’ inner edges and screw them in. Begin with the center screw and connect the hinge; align the edges and put the remaining screws in. Put the lids in the open position and screw the hinges’ other side. Close the lids and check to see everything is aligned.
8. Sand and Paint the Banquette Seating
Smooth out any rough edges with a sander inside and out. Sand the faces of all the separate trim pieces so one solid surface is formed. Vacuum and wipe the surface so that all the dust is removed. Use a paintable wood filler to fill out all screw holes and hairline the gaps. Paint the bench as you desire.
9. Use the Storage Space
Put kitchen things into the storage spaces of the banquette so that you will free up space in the kitchen. You can decorate the banquette with cushions and pillows so that you are comfortable.
Ideas to Install a Banquette in Your Kitchen
If you don’t want to build a banquette and prefer buying them online, then you can consider the below options!
1. Breakfast Nook
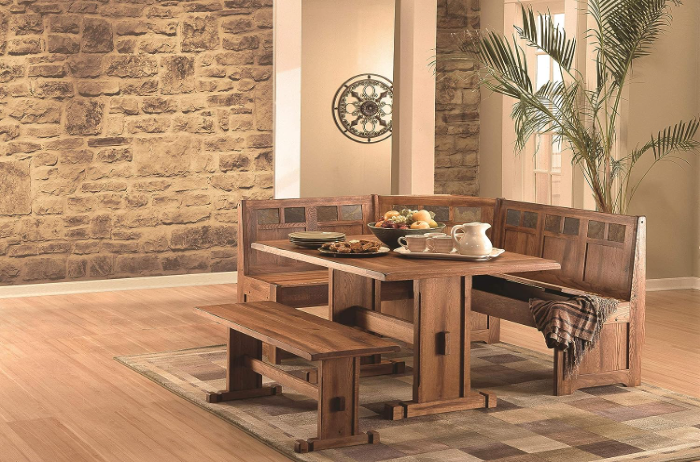
This breakfast nook is beautifully crafted from distressed mindi wood and finished with rustic oak; the short and long benches are reversible, so you can pick which side goes where. So much storage space under the seat makes your life much easier. This banquette has easy assembly, so you can start using this bench. These versatile benches fit any kitchen space’s function and style.
Also Read: 21 DIY Backyard Ideas to Keep Your Kids Entertained
2. Kitchen Corner Nook
You can infuse a touch of elegance into your house with this kitchen corner nook. The modern design is a timeless aesthetic that complements a wide range of decor themes. It is simple and elegant all at once; the espresso wood finish will add a flair to your kitchen. This banquette will undoubtedly be a wonderful addition to your home decor. You will enjoy many meals while sitting comfortably on this seating.
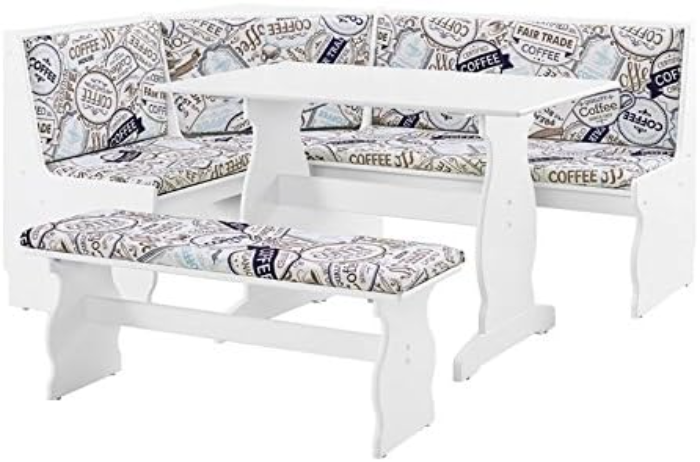
3. Breakfast Dining Set
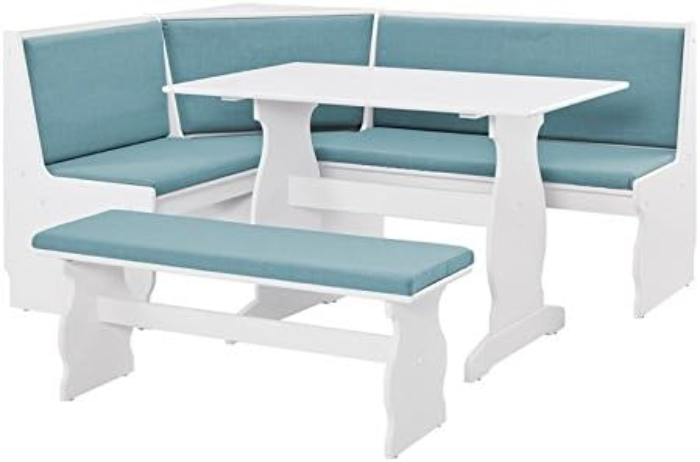
This beautiful kitchen corner nook will look wonderful in your kitchen. The white and blue colors will showcase its modern design. This dining set will easily complement your kitchen decor. The white wood finish gives it a classic look. You can easily assemble this nook with the help of your family and friends, and you will be having dinner parties very soon. The aesthetic of this banquette will be appreciated by all who visit your kitchen.
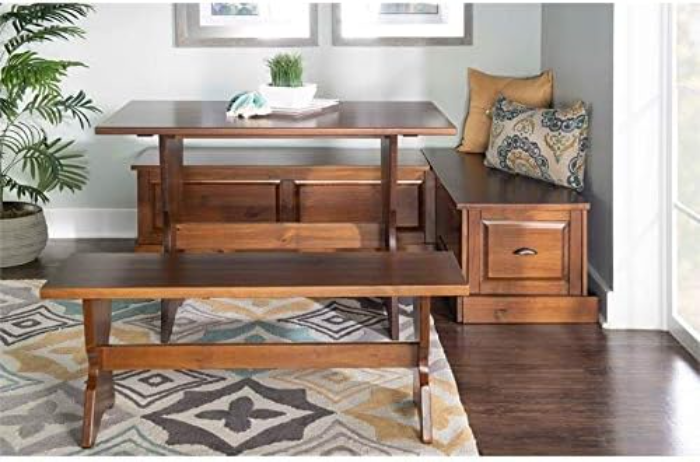
4. Corner Nook Dining Set
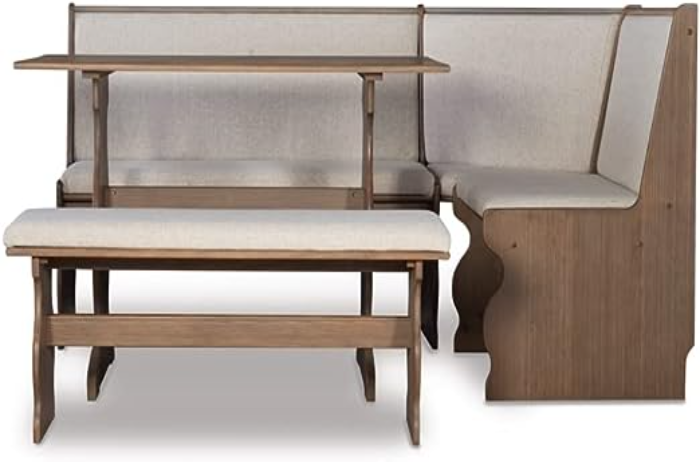
This corner nook is made from pine wood and engineered wood; it has a natural wood finish and custom upholstered seats. This corner nook set is perfect for small kitchen spaces in any home or a beach house. You can set this dining set in left or right-handed for your unique requirements. You get a cozy spot in any corner of your kitchen with this nook. It has just the right amount of space and function, ideal for meals and conversation. This nook can fit five people comfortably. Buy beautifully crafted banquette seating for your home, as it provides the perfect dose of space and function.
5. Breakfast Nook
This kitchen breakfast nook comes in mahogany solids and veneers; the vintage mocha finish looks even better in person. These benches have comfortable back and hidden storage units, making your kitchen less crowded. It is easy to assemble so that you will be eating delicious meals with your family and friends in no time. Bring timeless style and much value to your kitchen with this dining table set. Comfortable yet casual, this breakfast nook is ideal for any kitchen design.
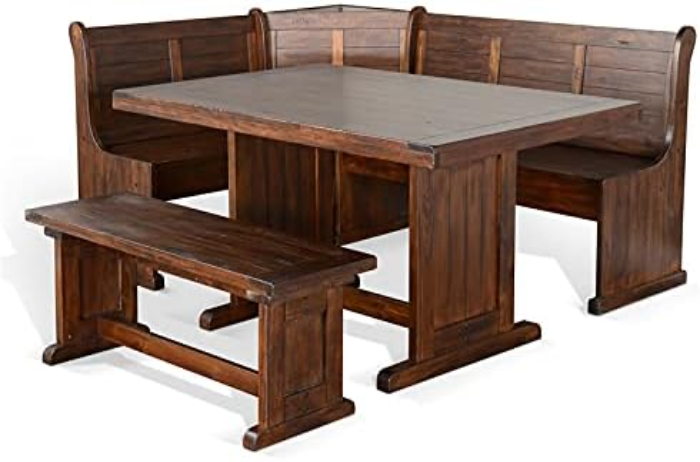
6. Indoor Kitchen Corner Breakfast Dining Nook
This breakfast nook is made from solid pine wood and has corner seating, a table, and a bench. A beautiful mixture of a black base, warm plank wood, and gorgeous accent touches. You can put it in left or right-handed based on your requirements. This nook will give you a cozy spot in your kitchen corner. Perfect for meals and conversation, you can gather your family and friends for wonderful meals. Five people can comfortably sit on it with the perfect amount of space and function.
7. Dining Nook Set in Natural
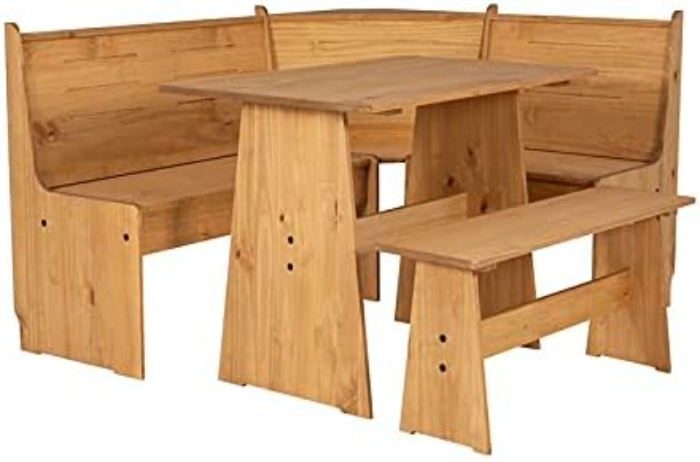
This dining nook is crafted from beautiful and solid pine wood with a natural wax finish. You get a warm and inviting spot to start the day or enjoy a mouthwatering meal with your family. It can be put in either direction based on your kitchen space. The bench seat flips open to hidden storage. Host a casual dining party, do your work project, or finish your homework; either way, you will be comfortable.
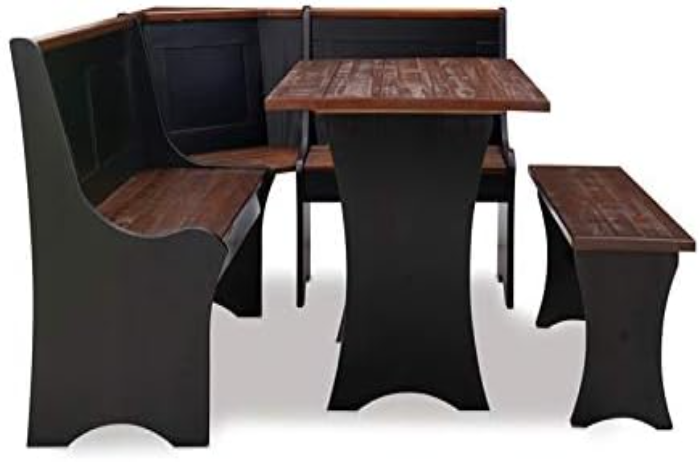
8. Backless Breakfast Corner Nook
This breakfast corner nook comes in walnut brown, adding a touch of elegance to your kitchen. The modern design has a timeless aesthetic complementing various decor themes. There are hidden storage units underneath, which can be filled with pillows, kitchen equipment, crockery, cutlery, and much more. Eat delicious meals while being surrounded by your friends and family while sitting in this dining nook. The wooden aesthetic goes extremely well with a wide range of decor styles.
Related: 21 Decorating with Plants Ideas to Beautify Your Living Space
Final Thoughts
You can install banquette seating in your kitchen if you are looking for a unique look. A banquette is a wonderful alternative to the normal choice of dining table and chairs.
The chic banquette works wonders in an open space kitchen or irregularly spaced kitchen. A banquette also provides storage options with its drawers, cubbies, and more.
This article shows you all you need to know to add a banquette to your kitchen. Write down in the comments below whether you have a banquette in your kitchen, how did you pick this particular banquette, when did you build the banquette, did you have any difficulties in building the banquette, and anything else you think others should know when adding a banquette to the kitchen.
Check This Next: 21 Dining Table Decor Ideas to Transform Your Christmas Theme