Is your digital camera’s rearview not working, leaving you frustrated and missing out on capturing precious moments?
You’re not alone! Many camera owners face this common problem and spend hours figuring out what’s wrong.
But don’t worry – we’ve got you covered.
This troubleshooting guide will walk you through simple steps to identify and fix your digital camera’s rear camera issues.
From checking connections to updating firmware, you’ll learn quick and easy solutions to get your camera back up and running in no time.
Say goodbye to the stress of a malfunctioning rear camera, and hello to stunning photos again!
Identification of Rear Camera Issues
| Problems | Features | Solutions |
| Blurry or Unclear Images | Dirty lens, misalignment, auto-focus problems | Clean lens with microfiber cloth; check lens alignment; adjust auto-focus settings |
| Camera Not Focusing Properly | Low light conditions, incorrect focus settings | Increase lighting; adjust manual focus settings or auto-focus settings |
| Error Messages | Firmware issues, internal malfunctions | Please refer to the user manual for specific error codes, reset the camera to factory settings, and update the firmware. |
| Unexpected Shutdowns | Battery issues, overheating | Replace or charge the battery, ensure the camera is not exposed to excessive heat, and check the power management settings. |
| Flash Not Working | Depleted battery, damaged flash bulb, settings issue | Ensure the battery is charged; replace the flash bulb if necessary; check flash settings in the camera menu |
| Slow Camera Response | High-resolution setting, memory card issues | Lower resolution settings; format memory card or replace with a higher speed card |
| Frequent Memory Card Errors | Damaged memory card, compatibility issues | Format memory card in camera; ensure memory card is compatible with camera; replace if necessary |
Accurately identifying issues with your digital camera’s rear view is crucial for ensuring proper functionality and longevity.
Diagnosing the problem correctly before attempting any troubleshooting steps is essential.
This first step will save you time and frustration in the long run.
Common Rear Camera Problems with Solutions
| Issue | Solution | Effectiveness |
|---|---|---|
| Battery Problems | Ensure the battery is charged; Use a tripod for stability; Clean dirty lenses or protectors. | High effectiveness based on user reviews and troubleshooting guides |
| Lens Errors | Clean lenses or protectors | Effective solution based on maintenance recommendations |
| Software Glitches | Adjust white balance; Adjust exposure compensation; Check cache levels; Reset preferences. | Effective solutions based on troubleshooting guides and user feedback |
1. Battery and Power Issues
Battery and power issues are a common cause of camera malfunctions.
If your camera turns off unexpectedly, won’t turn on, or if the battery drains more quickly than usual, it’s time to take action.
Battery Replacement
- To safely replace your camera battery, first turn off the camera.
- Locate the battery compartment and remove the old battery.
- Please properly insert the new battery to align it with the positive and negative terminals.
- Close the battery compartment securely.
Power Management Settings
- Adjust the settings to optimize your camera’s battery life.
- Enable sleep mode to turn off the camera automatically after inactivity.
- Reduce the LCD screen brightness and limit the use of power-hungry features like flash and continuous shooting mode.
2. Lens Problems of Your Camera
Lens issues are a major contributor to poor image quality. Blurry images, difficulty focusing, and physical blockages or dirt on the lens can all impact your photos.
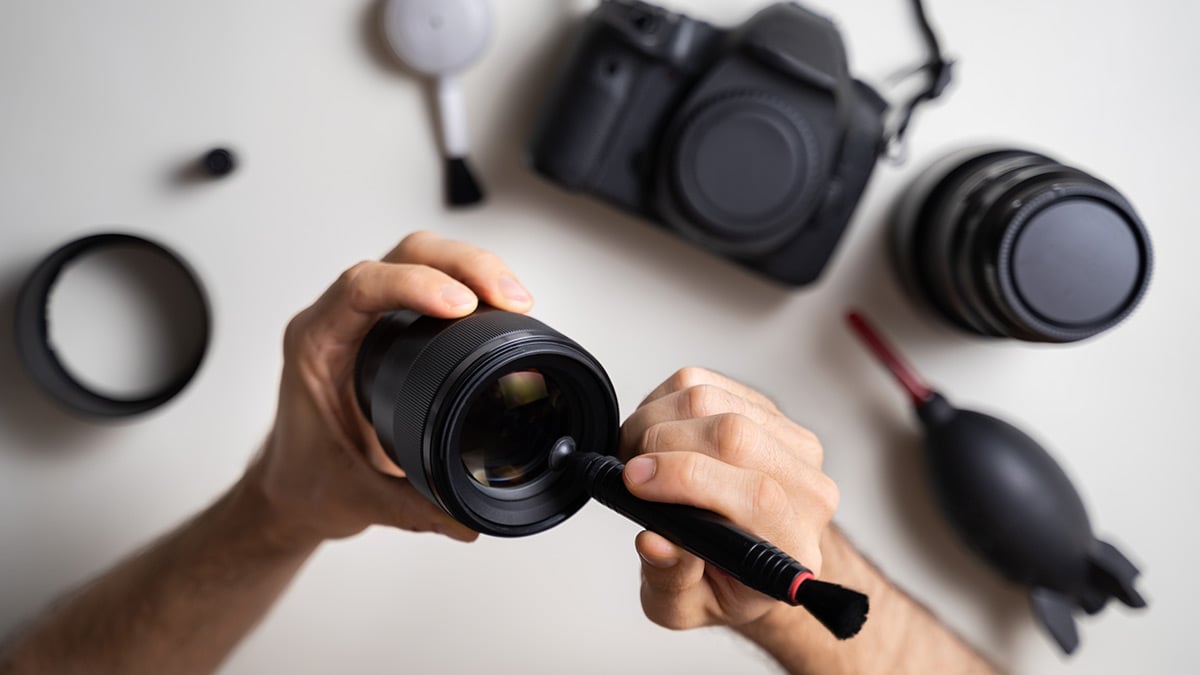
Lens Cleaning Techniques
- To safely clean your camera lens, use a soft-bristled brush or compressed air to remove loose dust and debris.
- Then, gently wipe the lens with a microfiber cloth or lens cleaning tissue, using a circular motion from the center outward. Avoid using rough materials or excessive pressure, which can scratch the lens.
Checking for Alignment Issues
- The lens may be misaligned if your images are consistently blurry or the camera has difficulty focusing.
- To check for alignment issues, remove the lens and visually inspect the mount for damage or debris. Then, reattach the lens, making sure it clicks securely into place.
- If the problem persists, professional servicing may be necessary.
3. Software Issues
Software issues can disrupt camera operation, causing freezes, error messages, and other frustrating problems.
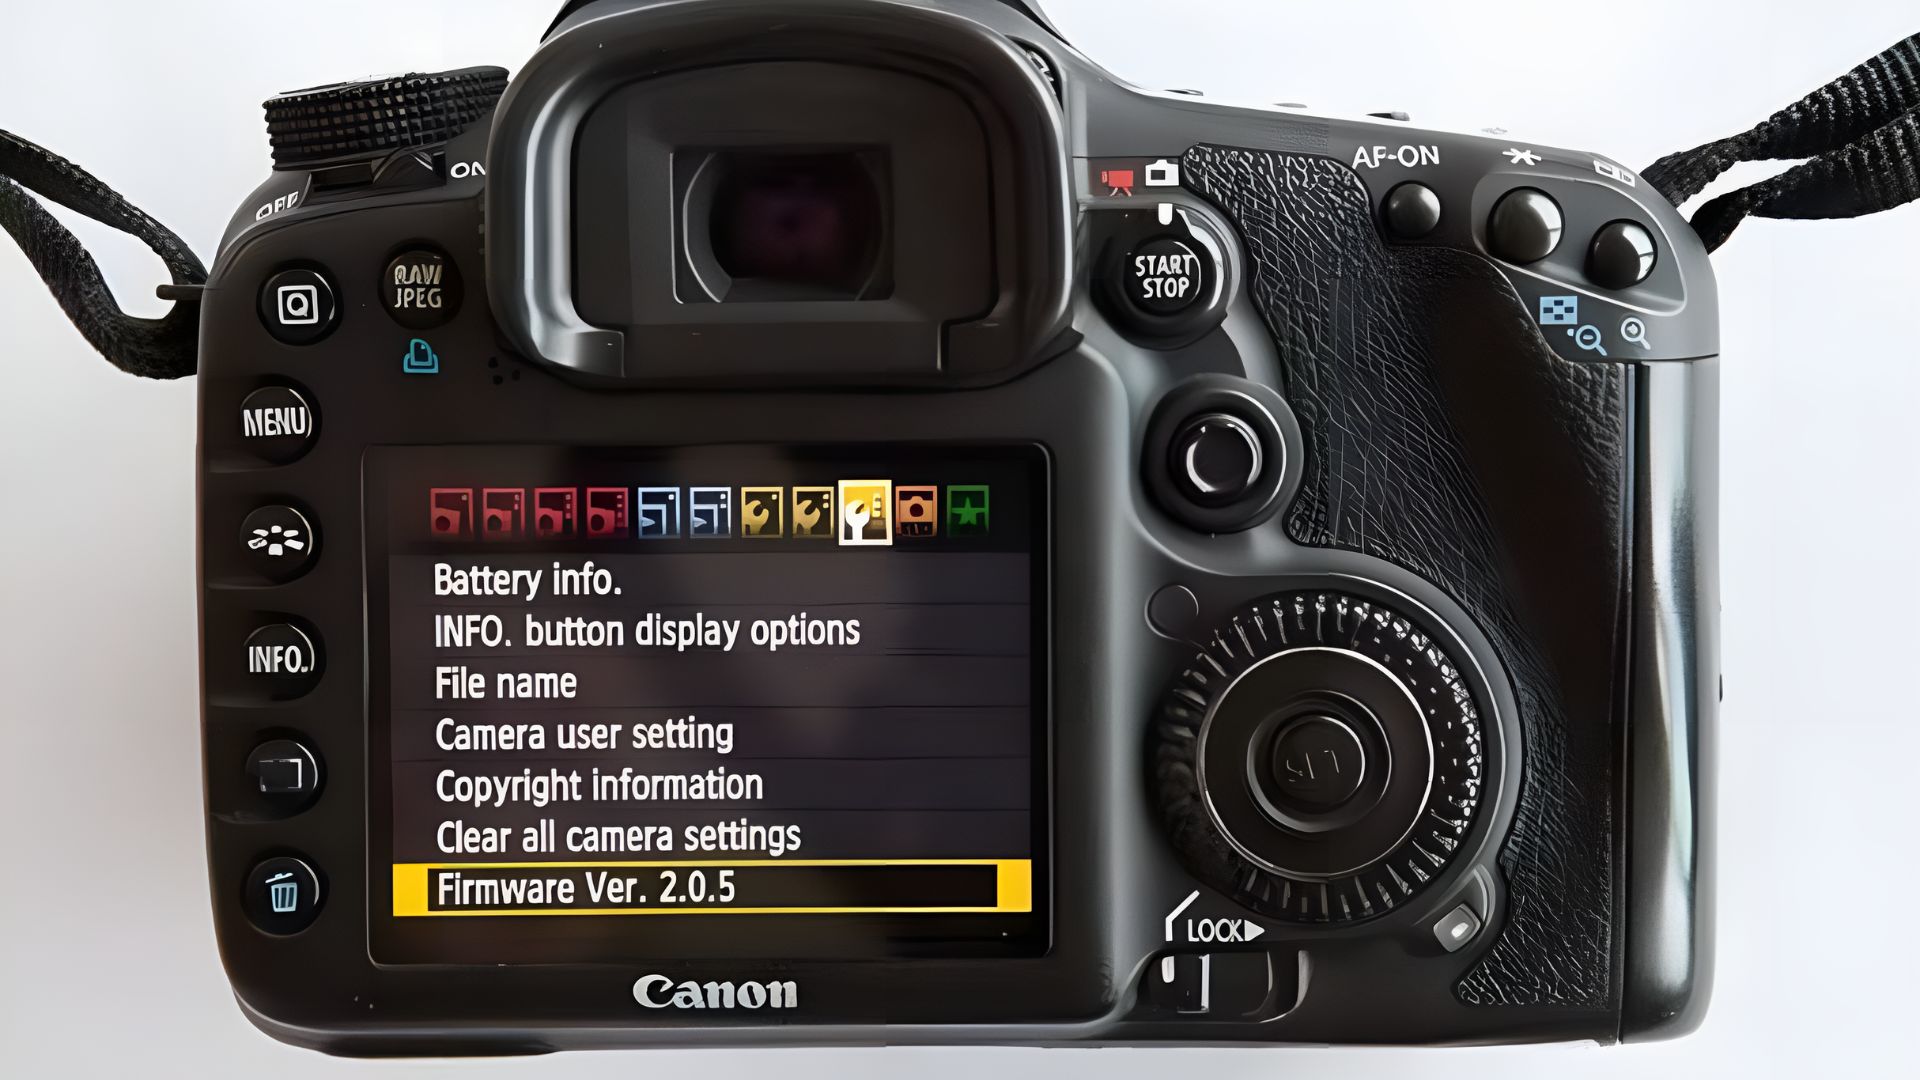
Firmware Updates
Keep your camera’s firmware current to ensure optimal performance and compatibility.
Check the manufacturer’s website for the latest firmware version and download instructions.
Connect your camera to your computer and follow the steps to install the update.
Resetting Camera Settings
- If your camera is experiencing software glitches, resetting it to factory settings can often resolve the issue.
- To reset your camera, navigate to the settings menu and look for an option labeled “Reset” or “Initialize.”
- Confirm that you want to reset the settings and wait for the process to complete.
- Remember that this will erase any custom settings you’ve previously configured.
Recognizing and addressing common rear camera problems is essential for maintaining your digital camera’s performance.
Regularly checking and maintaining your camera’s components, such as the battery, lens, and software, can prevent many issues.
If you encounter a problem, refer to the solutions outlined in this guide to get your camera back in working order.
Advanced Troubleshooting Techniques for Rear Camera
When basic fixes fail to resolve rear camera issues, it’s time to explore advanced troubleshooting techniques.
These methods address more complex and sensitive problems that require a higher level of care and expertise.
Properly handling these issues is crucial, as improper handling of mechanical and water-related damages can further exacerbate the problems.
1. Mechanical Failures
Common mechanical issues include stuck lenses, malfunctioning shutters, and unresponsive buttons. When attempting manual interventions, take precautions to prevent additional damage.
Use the appropriate tools and follow the manufacturer’s guidelines closely.
- Fixing a Stuck Lens: If your lens is stuck, gently try to manipulate it to release the mechanism. Be careful not to apply excessive force, which can cause permanent damage. If the lens remains stuck, it’s best to seek professional help.
- Addressing Shutter Malfunctions: Identify the specific issue with your shutter, such as failing to open or close properly or producing unusual sounds. Gently clean the shutter mechanism using a soft-bristled brush or compressed air. If the problem persists, it may require professional repair.
- Professional Intervention: If you’ve attempted these DIY fixes and the mechanical issues remain, it’s time to consider professional repairs. A skilled technician can diagnose and resolve complex problems without risking further damage to your camera.
2. Water and Moisture Damage
Moisture damage can range from minor splashes to complete submersion, each requiring a different level of care.
If your camera has been exposed to water, immediately power it off, remove the battery, and dry the external components using a soft, absorbent cloth.
- Immediate Care: To safely remove moisture from your camera, place it in a sealed container with silica gel packets or a warm, dry environment. Avoid using heat sources like hair dryers, which can cause further damage.
- Checking for Internal Moisture: If you suspect that moisture has penetrated the camera’s internal components, look for signs like fogging or condensation inside the lens or on the LCD screen. In these cases, professional servicing is necessary to prevent corrosion and electrical damage.
3. Long-Term Care and Precautions
- Invest in a waterproof case or a moisture-resistant camera bag to protect your camera from future water damage.
- Store your camera in a cool, dry place with adequate ventilation to prevent humidity buildup.
- Consult a professional immediately if you notice signs of severe water damage, such as electrical failure or visible corrosion.
You can extend your camera’s lifespan and maintain optimal functionality by mastering these advanced troubleshooting techniques.
Don’t be afraid to tackle complex issues, but also recognize the limitations of home repairs.
When in doubt or if the problem seems beyond your skills, seek the assistance of a professional.
With the right approach and care, you can keep your rear camera in top condition for years.
Maintenance Tips for Rear Camera to Prevent Future Issues
Consistent maintenance is crucial for extending your digital camera’s lifespan and ensuring optimal performance.
Adopting a regular maintenance routine can prevent many common issues and keep your camera in top condition for years.
1. Cleaning
- Keep your camera body, lens, and sensor clean to avoid dust spots or streaks affecting photo quality.
- Use a soft, dry microfiber cloth to gently wipe the camera body and lens.
- Use a specialized cleaning kit or consider professional cleaning services for the sensor.
- Avoid harsh chemicals or abrasive materials that damage the camera’s delicate components.
2. Storage
- Store your camera in a cool, dry place with adequate ventilation when not in use.
- Use a padded camera bag or a moisture-resistant container with silica gel packs to prevent humidity buildup.
- Avoid storing your camera in extreme temperatures, direct sunlight, or damp environments, as these conditions can cause damage and accelerate wear.
3. Software Maintenance
- Check for firmware updates regularly and install them when available.
- These updates often include bug fixes, performance enhancements, and new features that can improve your camera’s functionality.
- To ensure you have the latest firmware version, visit the manufacturer’s website or use the camera’s built-in update feature.
4. Protective Gear
- Invest in a high-quality camera case to shield your camera from scratches, bumps, and other mechanical damage.
- Use lens caps to protect your lenses when not in use, and consider using protective filters to safeguard the front element of your lens from scratches and debris.
5. Environmental Precautions
- When using and storing your camera, consider environmental conditions.
- Avoid exposing your camera to extreme heat, cold, or humidity, as these can damage the internal components.
- When moving your camera between different environments, allow it to acclimate gradually to prevent condensation from forming inside the camera.
Avoid exposing your camera to strong magnetic fields, such as those found near power generators or large electronic devices, as these can interfere with your camera’s electronics.
When using compressed air to clean your camera, be cautious not to spray too close to the camera or use excessive force, as this can damage sensitive components like the shutter or sensor.
Incorporating regular maintenance practices into your photography routine is essential for preventing common camera issues and ensuring the longevity of your equipment.
Following the guidelines outlined in this guide, you can keep your camera in top condition and avoid costly repairs.
Remember, a little effort goes a long way in maintaining the quality and performance of your digital camera.
Conclusion
Throughout this comprehensive troubleshooting guide, we’ve covered the most common issues digital camera owners face: battery problems, lens issues, software glitches, and mechanical failures.
Regularly maintaining your camera and promptly addressing any issues can significantly extend your camera’s lifespan and ensure optimal performance.
Remember, you can perform these troubleshooting techniques successfully.
With practice and patience, you’ll better understand your camera’s inner workings and become more self-reliant in resolving common problems.
Now that you’ve gained this valuable knowledge, it’s time to put it into practice.
- The next time you encounter an issue with your digital camera, refer to this guide and apply the relevant troubleshooting steps.
- Don’t hesitate to take action. Prompt intervention can prevent minor issues from escalating into more serious problems.
- If you face a particularly complex issue or wish to enhance your technical skills further, consider exploring additional resources such as online forums, video tutorials, or photography workshops.
- Continuous learning is key to mastering the art of camera maintenance and repair.
Keep this troubleshooting guide handy for future reference.
In short, by combining the knowledge gained from this guide with a proactive approach to camera maintenance, you’ll enjoy a well-functioning camera for years to come.
Frequently Asked Questions
How Do You Troubleshoot a Digital Camera?
Use diagnostic tools to check for physical damage and test settings and functions. Common issues include battery problems, lens misalignment, and software glitches.
How Do You Diagnose a Backup Camera?
Inspect wiring, connections, and the power supply for physical damage or obstructions. Test camera settings and use diagnostic tools to identify malfunctions.
How Do I Know if the Reversing Camera Is Faulty?
Look for signs like no video feed, blurry or distorted images, frozen display, or error messages. These indicate a faulty reversing camera.
What Causes a Rear Camera to Stop Working?
Damaged components, loose connections, software issues, or electrical faults can cause malfunctions. Regular maintenance helps prevent malfunctions.